There is a specific kind of magic that happens when you combine classic Tex-Mex comfort food with heavy-duty cast iron. For our cast iron enchiladas, we aren’t just using one pan, we’re using a combination of three cast iron pieces: two 10-inch Lodge cast iron skillets for the prep and a 9×13 Lodge cast iron casserole pan for the final bake.
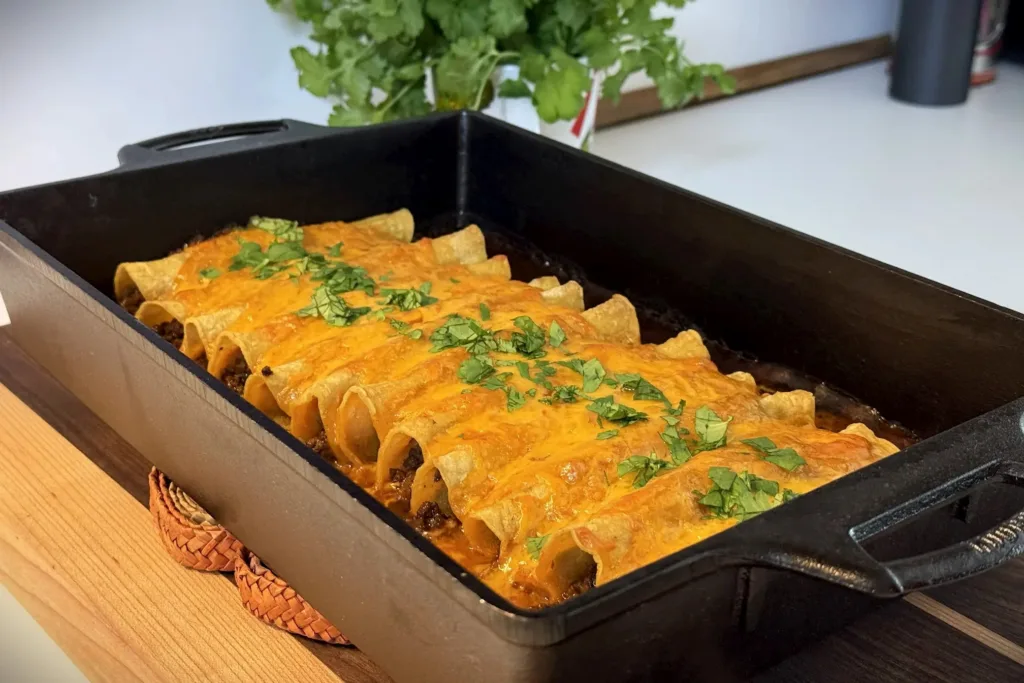
The cast iron holds heat so well that the bottoms of the enchiladas stay tender and saucy while the canola oil-dipped edges turn into crispy, golden-brown “chips.” If you’ve been struggling with soggy tortillas or cracked wraps, this three-pan method is the game-changer you’ve been looking for.
Prep & Cook Info
Prep time: 20 Minutes
Cook time: 25 Minutes
Total time: 45 Minutes
Servings: 4–6
Equipment: (2) 10-inch Cast Iron Skillets, (1) 9×13 Cast Iron Casserole Dish
Cast Iron Enchiladas Ingredients
1 lb Ground Beef
1 packet (1 oz) Taco Bell Taco Seasoning
1/4 cup Water
12 Soft Yellow Corn Tortillas
1 can (10 oz) Old El Paso Medium Enchilada Sauce
12 oz Sharp Cheddar Cheese (shredded)
Canola Oil (for softening tortillas)
Optional Toppings: Sour cream, pico de gallo, fresh cilantro
Instructions for Cast Iron Enchiladas
- Preheat and Pan Prep
Preheat your oven to 375°F. Take your 9×13 casserole dish and spread about 1/2 cup of the enchilada sauce across the bottom. This prevents sticking and ensures the bottom of the tortillas absorbs that rich Tex-Mex flavor. - Season the Beef (Skillet #1)
In your first skillet over medium heat, brown the ground beef until crumbled and no longer pink. Drain the excess fat and return the skillet to the stove. Sprinkle in the taco seasoning and 1/4 cup of water. Stir until the water is fully absorbed and the beef is well-coated. Remove from heat and set aside. - The “No-Crack” Tortilla Softening (Skillet #2)
To prevent your corn tortillas from splitting when you roll them, add a thin layer of canola oil to your second skillet over medium heat. Using a spatula, flash-fry each tortilla for 3–5 seconds per side. They should be pliable and lightly coated, not crunchy. - Assembly (Roll Immediately)
While the tortillas are still hot and flexible from the oil, lay one flat and immediately add 1/3 cup of the beef mixture in a line down the center. Top with 1/4 cup of shredded cheese. Roll it tightly and place it seam-side down in the casserole dish. Repeat until the pan is packed. - The “Crispy Edge” Technique
Pour the remaining enchilada sauce in a thick line down the center of the rolled tortillas. Crucial Step: Leave the ends of the tortillas dry and exposed. Sprinkle the remaining cheese over the sauced center only. This allows the oil-dipped edges to “fry” against the hot cast iron while the middle stays tender. - The Bake
Bake for 25 minutes. You are looking for bubbling cheese and those signature crispy Tex-Mex tortilla tips. Remove from the oven and let rest for 5 minutes before serving directly from the pan.
Pro-Tips for Success
- Thermal Mass: Cast iron retains heat significantly better than glass or ceramic, meaning your cast iron enchiladas stay piping hot on the table much longer.
- The Oil Dip: Don’t skip the second skillet! Using canola oil to soften the tortillas is the difference between a “shredded mess” and a professional-looking enchilada.
- Mealie Users: This post is fully optimized for your self-hosted recipe managers! Just paste the URL into your “Import” tool and the schema will populate the ingredients and steps automatically.
While You’re Here…
If you’re looking for more ways to use cast iron, check out our first attempt at Cast-Iron Pizza! It turned out great despite the wonky shape! If you’re the kind of person who likes the DIY approach to cooking, you might get a kick out of my tech projects too. When I’m not using my Lodge pans, I’m usually messing with home servers or custom electronics. Feel free to check out how I set up Home Assistant for the camper or my guide on building a DIY GPS unit to track my camper’s location for accurate weather and time zone information.