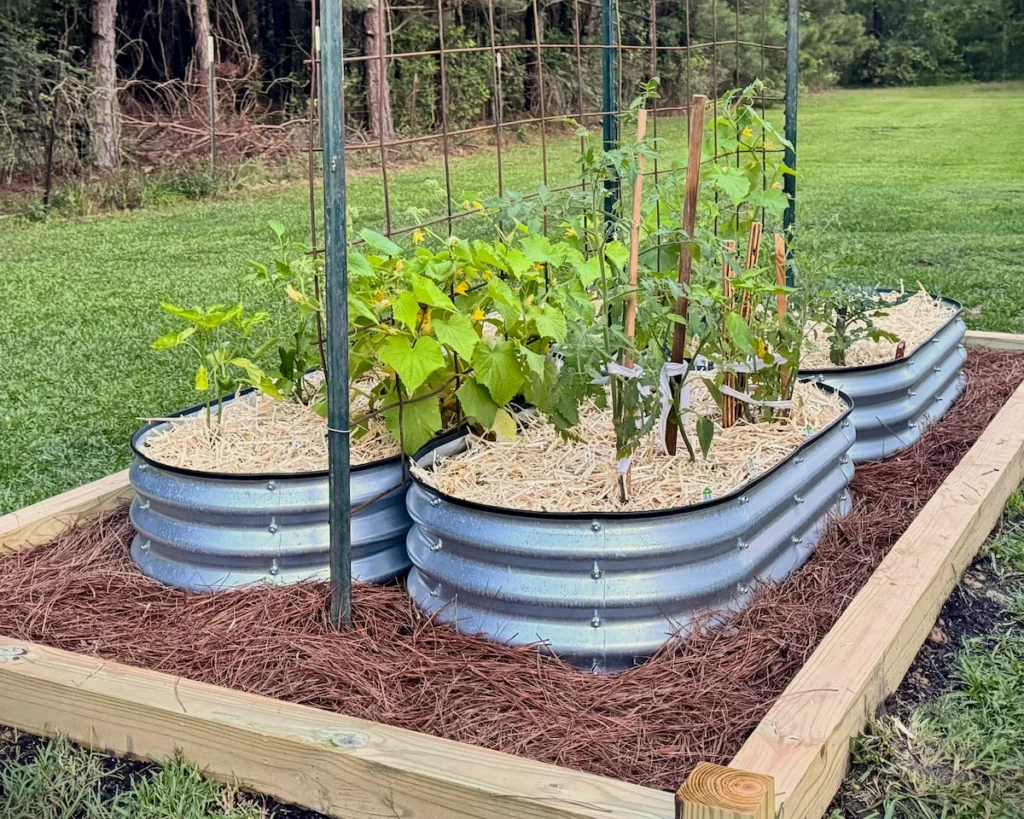
In the first part of this series, we detailed the construction of our raised garden beds, from assembling the galvanized faux stock tanks to the framing with 4×4 lumber (that serves as a decorative border, a protective mowing barrier, and a clean way to keep the surrounding ground bedding in place) to salvaging an old cattle panel for a trellis. With the main garden layout finished, it was time to lay the groundwork for a fully automated irrigation system that would handle our watering needs hands-free using easily found parts from Lowes and Atwoods. The parts list (with reference numbers for the article) is listed at the bottom of this article.
Infrastructure: Plumbing for Our Automated Irrigation System
Our home sits on a pier and beam foundation, which gives us open access to the main water lines. We tapped into the existing water line using a 3/4 inch PVC tee (12). From that tee, we used a small piece of one of the 10-foot PVC pipes (10) that we purchased to run over to the valve setup.
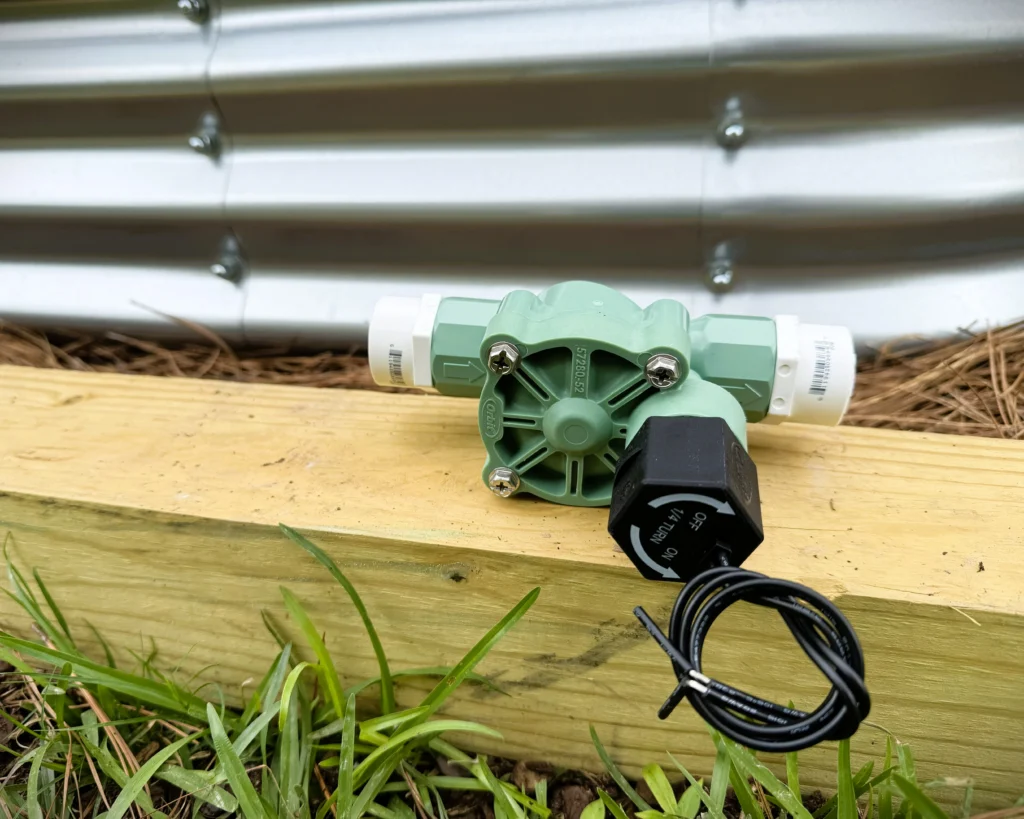
To control the water flow, we picked up an Orbit 3/4 inch electric inline valve (9). We chose this specific valve based on price alone. Instead of mounting it out in the yard where the sun, dirt, and freezing winter temperatures would degrade the plastic, we mounted it safely under the house. This keeps it completely out of the elements and makes it incredibly easy to replace if it ever fails. We used two 3/4 inch male thread adapters (13) to screw directly into each side of the valve, connecting it securely into the line. From the output side of the valve, we ran the remaining lengths of the two 10-foot pieces of 3/4 inch Schedule 40 PVC pipe (10) out across the yard to the garden bed.
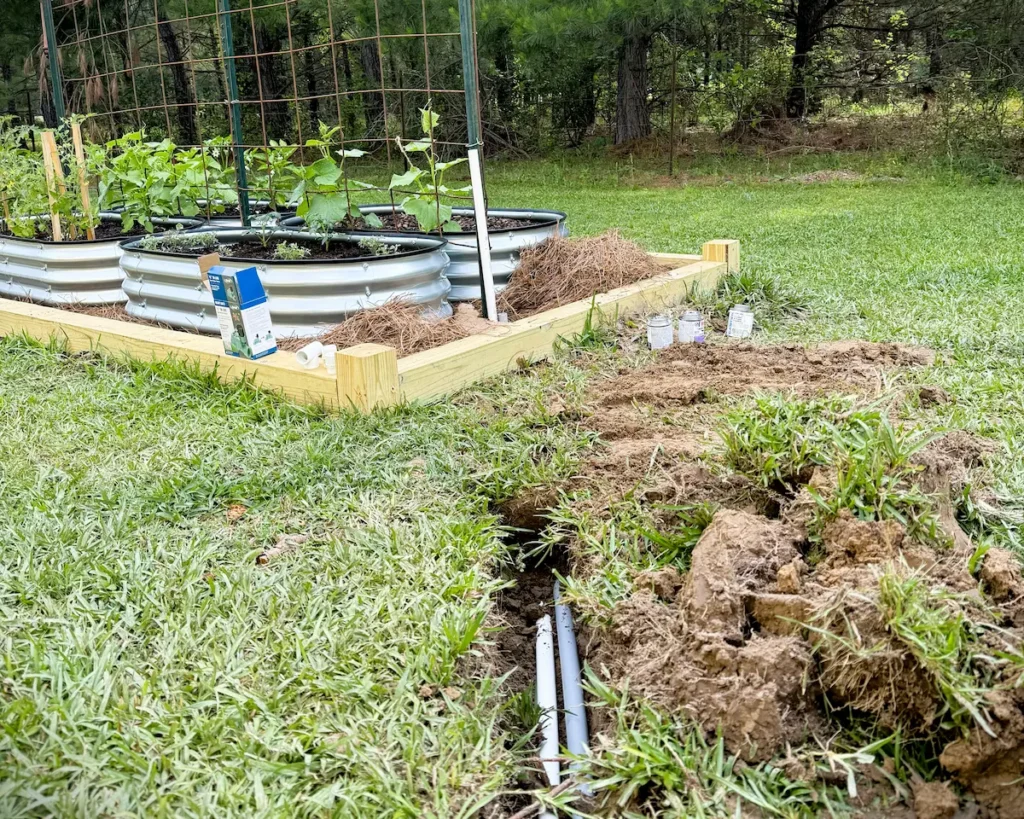
While doing this we didn’t just run an underground water line. Since the trench was already open, we also buried a parallel length of 3/4 inch gray electrical PVC conduit (14) along with two 90-degree conduit elbows (15) to complete the run. This was a crucial bit of future-proofing. We had some gel-filled Cat6 cable lying around, so we went ahead and pulled it through the conduit to the garden bed. The gel filling protects the wires from moisture underground, giving us a robust connection for sensors or any other low-voltage needs later on.
The Drip Adapters and the PVC Main Line Setup
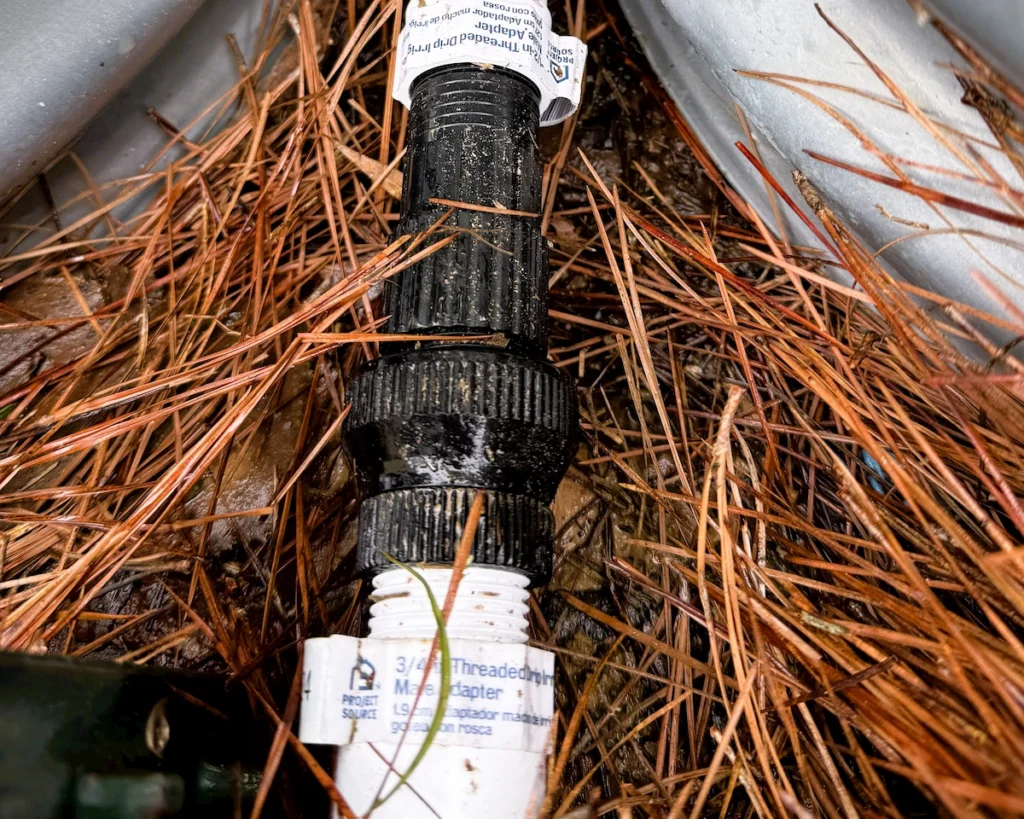
Once the 3/4-inch main line reached the garden framing, we needed to adapt it down to size and add the required safety hardware for a proper drip irrigation installation. To get the materials started, we bought a deluxe drip irrigation kit from Atwoods (17). This kit was a fantastic starting point because it came with everything needed for the initial setup, including 50 feet of 1/2 inch mainline tubing, 50 feet of 1/4 inch emitter tubing, and the vital components every automated irrigation system needs: a pressure regulator and a backflow preventer setup, also known as an anti-siphon backwash protector.
Right at the edge of the garden frame, we used a 3/4 inch slip to male hose thread adapter (7) paired with a 1/2 inch slip to female hose thread adapter (8) to complete the transition from our 3/4 inch main line down to 1/2 inch PVC. This specific hose-threaded junction is where we screwed on the backflow preventer and the pressure regulator from the Atwoods kit (16).
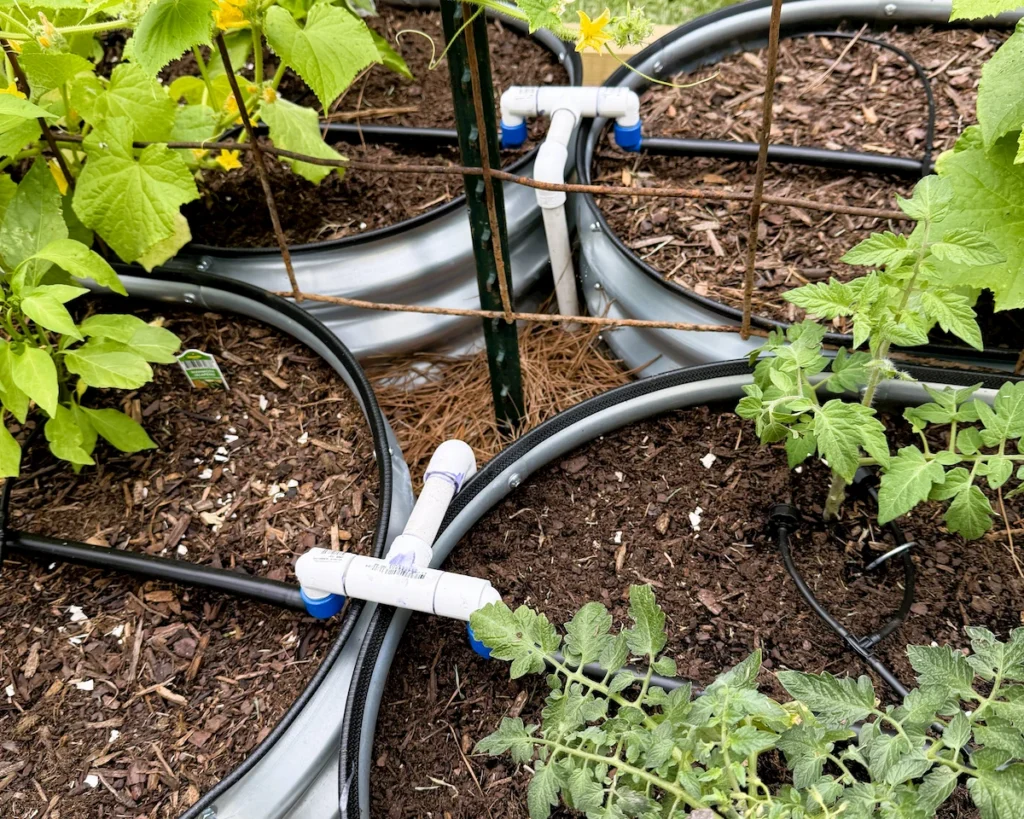
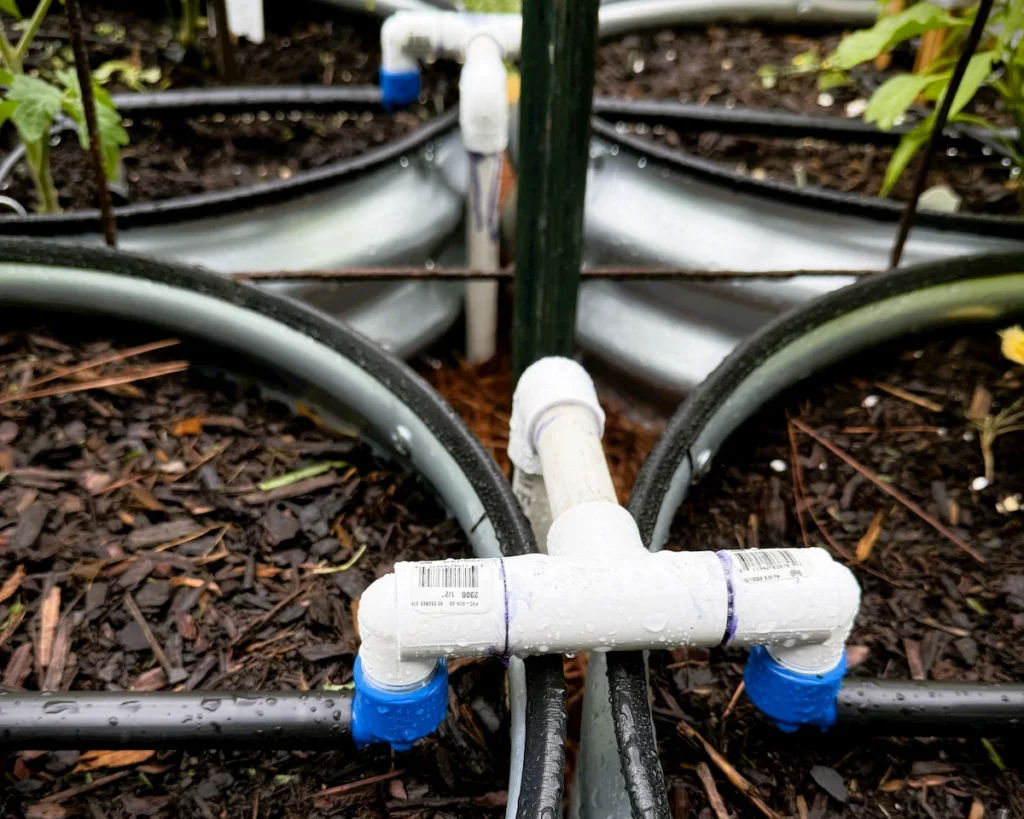
With the line safely downsized, regulated, and protected against backflow, we ran the 1/2 inch rigid PVC line down the center of the garden beds. We used a 1/2 inch PVC tee (5) to split the line from the center of all 4 beds out to each side where the beds sit back to back, used a 90-degree elbow (4) to bring the line up over the edge of the beds, another elbow (4) to shoot it over to the center of the beds, and then used another tee (5) to split the line so it could service the beds on both sides.
From those tees inside the beds, we used a slip to male threaded PVC elbow (3) to face the line downward. We paired this with an Apollo 1/2 inch 90-degree polypropylene elbow (1) to transition directly to the flexible irrigation tubing inside the bed. These twist-on barbed connectors worked amazingly well, providing a perfectly watertight seal even without using a hose clamp.
The Square Foot Garden Irrigation Grid
From those barbed connectors inside the beds, We ran a 4-foot piece of the 1/2 inch flexible tubing straight down the middle of each container bed and plugged it with a 1/2-in Polypropylene Plug (2) to build our watering distribution network.
To distribute the water to individual plants, we used push-in 1/4 inch barbed tee connectors (6). We installed these at exact 12-inch intervals along the mainline. This layout serves a dual purpose. It distributes water perfectly, and it visually marks the one-foot grid locations for each plant square in our square foot gardening system.
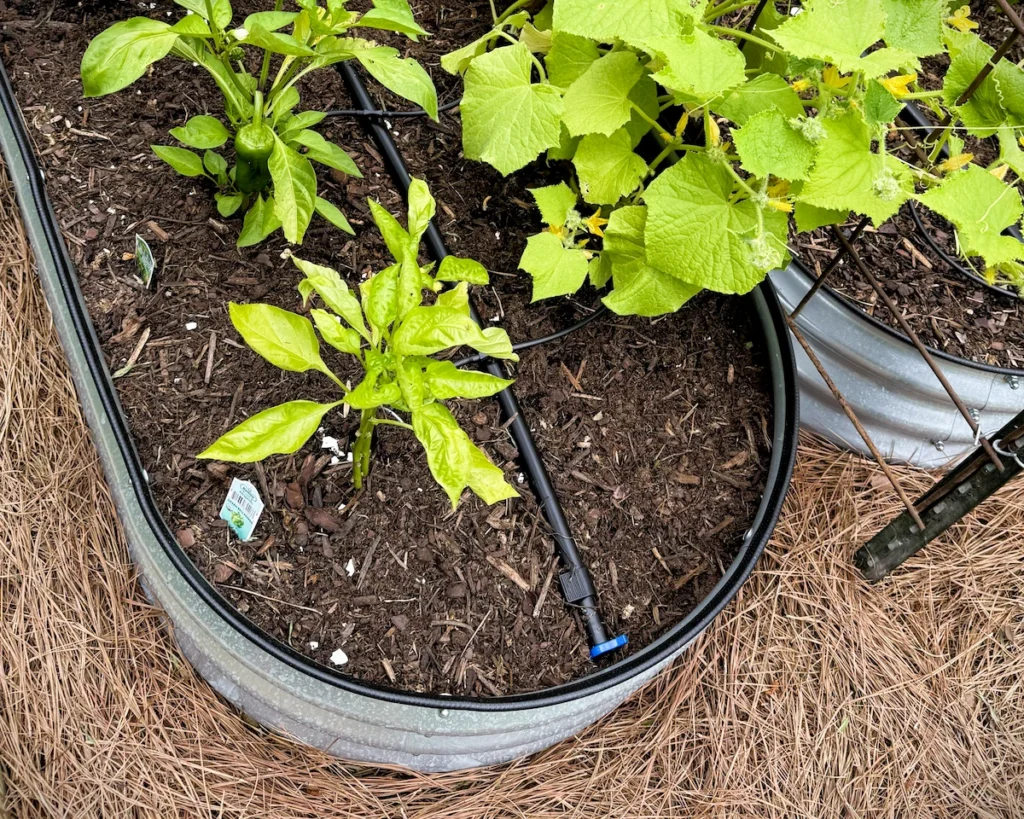
The Atwoods kit (16) came with twenty 1 GPH (gallons per hour) pressure compensating emitters, along with a few other miscellaneous emitters. To keep things highly standardized and simple to maintain, we threw out the oddball emitters and stuck strictly to the 1 GPH drippers. We bought an extra pack of them at Atwoods (17) to ensure we had backups on hand.
For standard plants, a single 1 GPH emitter sits right at the base. For thirsty plants that demand a lot more water, like our surprisingly hard-to-find Roma tomato, we simply doubled up the 1 GPH emitters in that square. If an emitter ever clogs or fails in the future, having only one style of part on hand means we can swap it out in five seconds flat.
What’s Next?
The mechanical grid is now fully laid out, the water main is buried, we fired up the valve with a 24v transformer to pressure test for leaks and everything is ready. If you have no plans to automate your garden, you can completely skip the electric valve and electrical conduit setup. Instead, you would just run a standard water line to a manual faucet valve placed right at the garden end to turn it on and off by hand. But since we are going fully automated, the next step is adding the brains. In our next post, we will add some “smarts” to the system to water them on a schedule, but only when needed based on forecast, soil moisture, etc.
The Bill of Materials
Here is the exact shopping list, part numbers, price breakdown and reference numbers from the article for all the plumbing and irrigation components we used in this build:
| Ref # | Source | Part Name / Description | Item / SKU # | Model # | Qty | Unit Price | Total Price |
| (1) | Lowes | Apollo 1/2-in 90-Degree Polypropylene Elbow | #4911509 | ABTFE12 | 4 | $1.01 | $4.04 |
| (2) | Lowes | Apollo 1/2-in Polypropylene Plug | #4911535 | ABTP12 | 4 | $1.18 | $4.72 |
| (3) | Lowes | Charlotte Pipe 1/2-in 90-Degree Sch 40 PVC Elbow | #22691 | PVC 02306 0600 | 4 | $1.78 | $7.12 |
| (4) | Lowes | Charlotte Pipe 1/2-in 90-Degree Sch 40 PVC Elbow | #23867 | PVC 02300 0600 | 4 | $0.70 | $2.80 |
| (5) | Lowes | Charlotte Pipe 1/2-in Sch 40 PVC Tee (Pressure) | #23873 | PVC 02400 0600 | 3 | $0.83 | $2.49 |
| (6) | Lowes | Orbit 1/4-in Barbed Drip Irrigation Tee (25-Pack) | #305770 | 64841 | 1 | $6.97 | $6.97 |
| (7) | Lowes | Project Source 3/4-in Slip Drip Male Adapter | #5454000 | 1140025 | 1 | $2.68 | $2.68 |
| (8) | Lowes | Project Source 1/2-in Slip Drip Female Adapter | #5453993 | 1140028 | 1 | $2.38 | $2.38 |
| (9) | Lowes | Orbit 0.75-in Electric Inline Irrigation Valve | #806844 | 57280L | 1 | $17.48 | $17.48 |
| (10) | Lowes | IPEX 3/4-in x 10-ft 480 Psi Sch 40 PVC Pipe | #23971 | 522115 | 2 | $6.54 | $13.08 |
| (11) | Lowes | Charlotte Pipe 3/4-in Sch 40 PVC Coupling | #23850 | PVC 02100 0800 | 1 | $0.54 | $0.54 |
| (12) | Lowes | Charlotte Pipe 3/4-in Sch 40 PVC Tee (Pressure) | #23874 | PVC 02400 0800 | 1 | $0.77 | $0.77 |
| (13) | Lowes | Charlotte Pipe 3/4-in Sch 40 PVC Male Adapter | #23856 | PVC 02109 0800 | 2 | $0.72 | $1.44 |
| (14) | Lowes | CANTEX 3/4-in x 10.0-ft Gray PVC Conduit | #72809 | A52AG12U | 2 | $6.48 | $12.96 |
| (15) | Lowes | CANTEX 3/4-in 90-Degree PVC Conduit Elbow | #50958 | L5233824 | 2 | $1.48 | $2.96 |
| (16) | Atwoods | Dig Corporation Deluxe Drip Kit with Anti-Siphon | SKU: 50740255 | 507402551 | 1 | $29.99 | $29.99 |
| (17) | Atwoods | Dig Corporation 1 GPH Dripper (10-Count) | SKU: 50740080 | 507400801 | 1 | $4.99 | $4.99 |
| Total: | $117.41 |